IDEA EXPLORATION:
Inspired by my explorations of the Ipswich Museum and Museum Vrolik in Amsterdam, I would like to explore the idea of eternally preserving/suspending pieces in a clear base.

Museum Vrolik

My own image.
Although, most of the pieces that I have currently created are not water/heat resistant.
The delicate crystals I created would not withstand water, and formaldehyde (the liquid in the jars) is beyond my reach.
Instead, I would like to experiment with the use of resin or glass.
I have no experience with glass, nor the facilities to use it, so resin is the medium I would like to explore.
My interest in resin was originally inspired by Jen Hall.
Her use of resin is not crystal clear, instead it is cloudy and slightly pink (like rose quartz might be.) Her resin piece captures the hand prints of herself and her son. The imprints are hidden internally in the resin block.
Instead of HIDING things in my develops of resin, I would like them to be fully visible.
I had the idea of suspending my insects inside a clear resin block like this one, but I felt that that was far too simple and far too unnatural.


The effects of the ideas above would be far too clinical and sharp edged for me. It would seem far too much like I was trying to display the insect in a museum. I am looking for a formal, interesting way to present the insect whilst making an interesting statement.
I would like to give the feeling that the insect has been trapped (like in amber, or in glass).
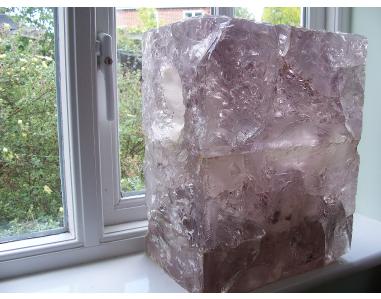
I found inspiration in my own collection.

I found interest in these small, transparent crystals. I could imagine recreating them using clear resin, using the signature "pointed tower" shape to give that natural look.

I would like them to be much larger than the points above, which are only about the size of a 50p coin at smallest, and an AA battery at most. The large pink crystal on the left is more the size of a pair of hands. That is more of the size that I would like to aspire to.

My own image of myself and my own crystals.

Above is a similar point that is much taller, made out of clear quartz. I can imagine insects trapped inside it like they would be trapped inside amber.
I drafted a plan on paper of the process I would take to create the effect I wanted.

Process briefly explained:
1. I wanted to use wood as a base to create the shapes I wanted. I chose the largest, squarest pieces of wood I could find to use as bases.
2+ 3. Using a sanding tool, carefully begin to sand the corners into a natural point. I did not force the geometry at first, I wanted it to look natural and imperfect. But I found that the best results were gained by going for symmetry, as crystals naturally form perfectly symmetrically at the best of times.
4. Repeat the process to create lots of different shapes and sizes.
5. Sand extra facets into some of the pieces.
6. Using the new "wooden crystal" to make a mould, place it into alginate or plaster to create an exact imprint of your wooden crystal.
7. Let the plaster / alginate dry and remove the wooden crystal to reveal a mould.
8. Fill the new mould with plaster or resin.
9. Remove the new, exact copies of your wooden crystal cast in resin or plaster.
Extra steps:

1. Pour clear resin into the mould and suspend an item into the resin. In this case, an insect.
2. Remove the resin from the mould when it has cured, revealing a crystal clear "crystal" with an insect suspended inside of it.
3. Repeat and experiment with different shapes, sizes and specimens.
In process:


Wooden crystals.

Making moulds of the 2 smallest "crystals" using alginate.

Exact imprints of the crystals, ready to be filled.
Below are the remains of my scorpion.
Since he fell apart, I decided to sever the pieces that were the most recognisable (the claws and signature scorpion tail) to see if I could make use of them. As it happens, they fitted perfectly into the alginate moulds of the small wooden crystals.

I used fishing wire to suspend them into the moulds, before filling them with clear resin.

I left the resin about a week to cure. I wanted to be sure that they were completely solid before I removed them... But what I received was much less than I anticipated.
Below are the results.

Unfortunately, the moisture in the alginate forbade the resin to cure completely. The moisture meant that the resin cured internally, but the outside was still wet, sticky and had became opaque. This was a huge letdown.
I removed the sticky, wet half-cured crystals from the alginate moulds and suspended them in fresh air for another week to see if they would cure that way.
Below are the revised results.

This is close to what I had anticipated, although with many flaws.
1. The shape had softened so that it was more of a soft point than a sharp "crystal" geometric point.
2. The amount of time that it took to cure meant that the claw slowly escaped the resin, floating to the top so that the arm was outside of the resin, and only the claw was suspended.


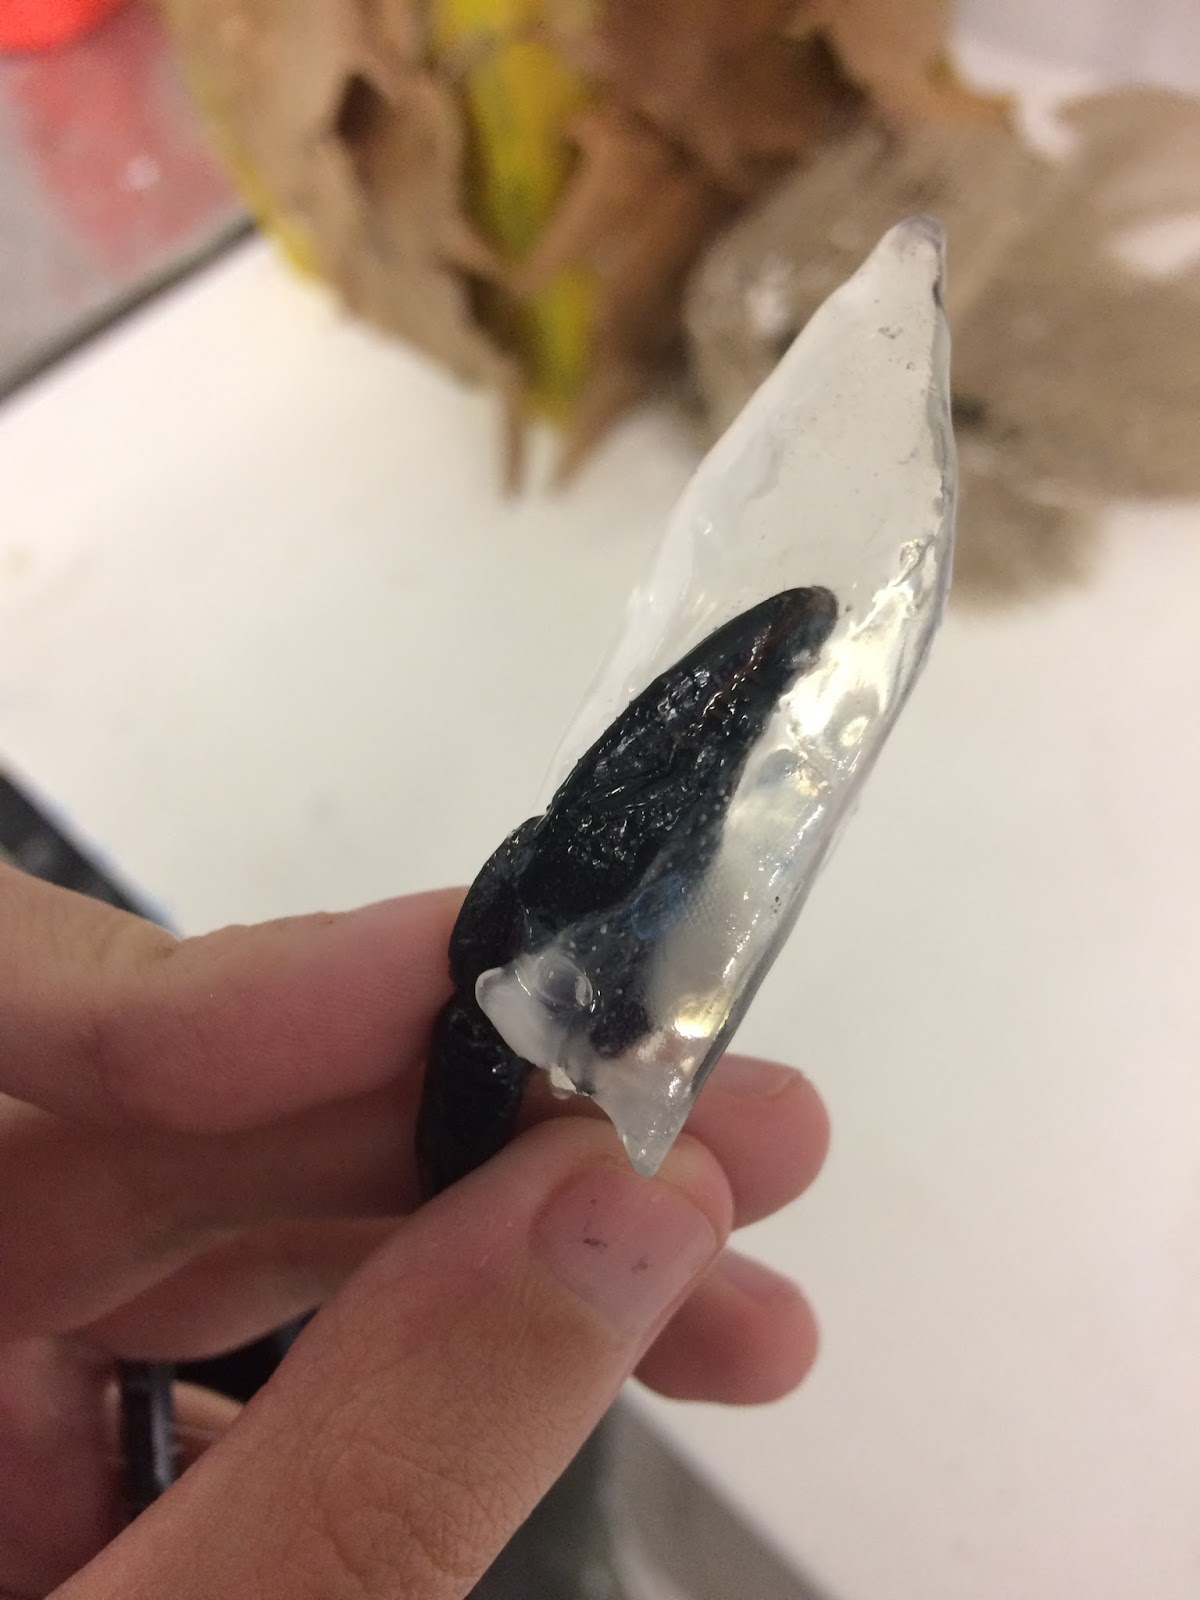
In the image above you can see how the claw is barely suspended in the resin at all. Half of the claw is trapped, but most of it is revealed. It is not the look that I was going for.

Regardless, it's still an interesting experiment. I can imagine that this would have been very interesting if the claws were still attached to the scorpion.

The tail was not much better. In fact, it was very similar, and the tail had begun to escape too.
Although it was not the effect that I was going for, I know that I learnt a lot from it. I learnt that alginate was not the way to go, as the moisture does not sit well with resin. In the future, I would use a silicone or plaster mould instead.
Also, I would make sure to weigh the suspended item down somehow so that it did not start to float out.
I learnt from my mistakes and began to create different moulds for the same purpose.

First, I tried again with alginate. I made the impressions with the wooden crystals, and then filled it entirely with plaster instead of resin. I knew that plaster would cure regardless of the moisture in the alginate, so I was hoping to create a plaster replica of my wooden crystals.
The results were interesting.
I had expected them to work simply, but it did not work exactly how I wanted it to.
I feel that the impression was not made correctly, or perhaps I removed the wooden crystal from the alginate too soon/too late and distorted it, because the results below are not exact blueprints of my original wooden crystal.


Alginate had somehow trapped itself in the plaster and distorted the geometric shape.

The smaller one turned out much better. Not perfect, but much better.
Again, I had learnt from my mistakes. Next time I would fully lubricate my wooden crystals before placing them into the freshly-mixed alginate, to make sure that they could easily slide out of the mould when removed and leave a clean imprint.
I kept this in mind when I made my next experiment.

I suspended a well-lubricated wooden crystal directly into plaster. The wooden block is providing as a paperweight to make sure that the wooden crystal does not float up and out of the plaster.

Before I had even attempted to remove the wooden crystal from the plaster, it had cracked somehow.

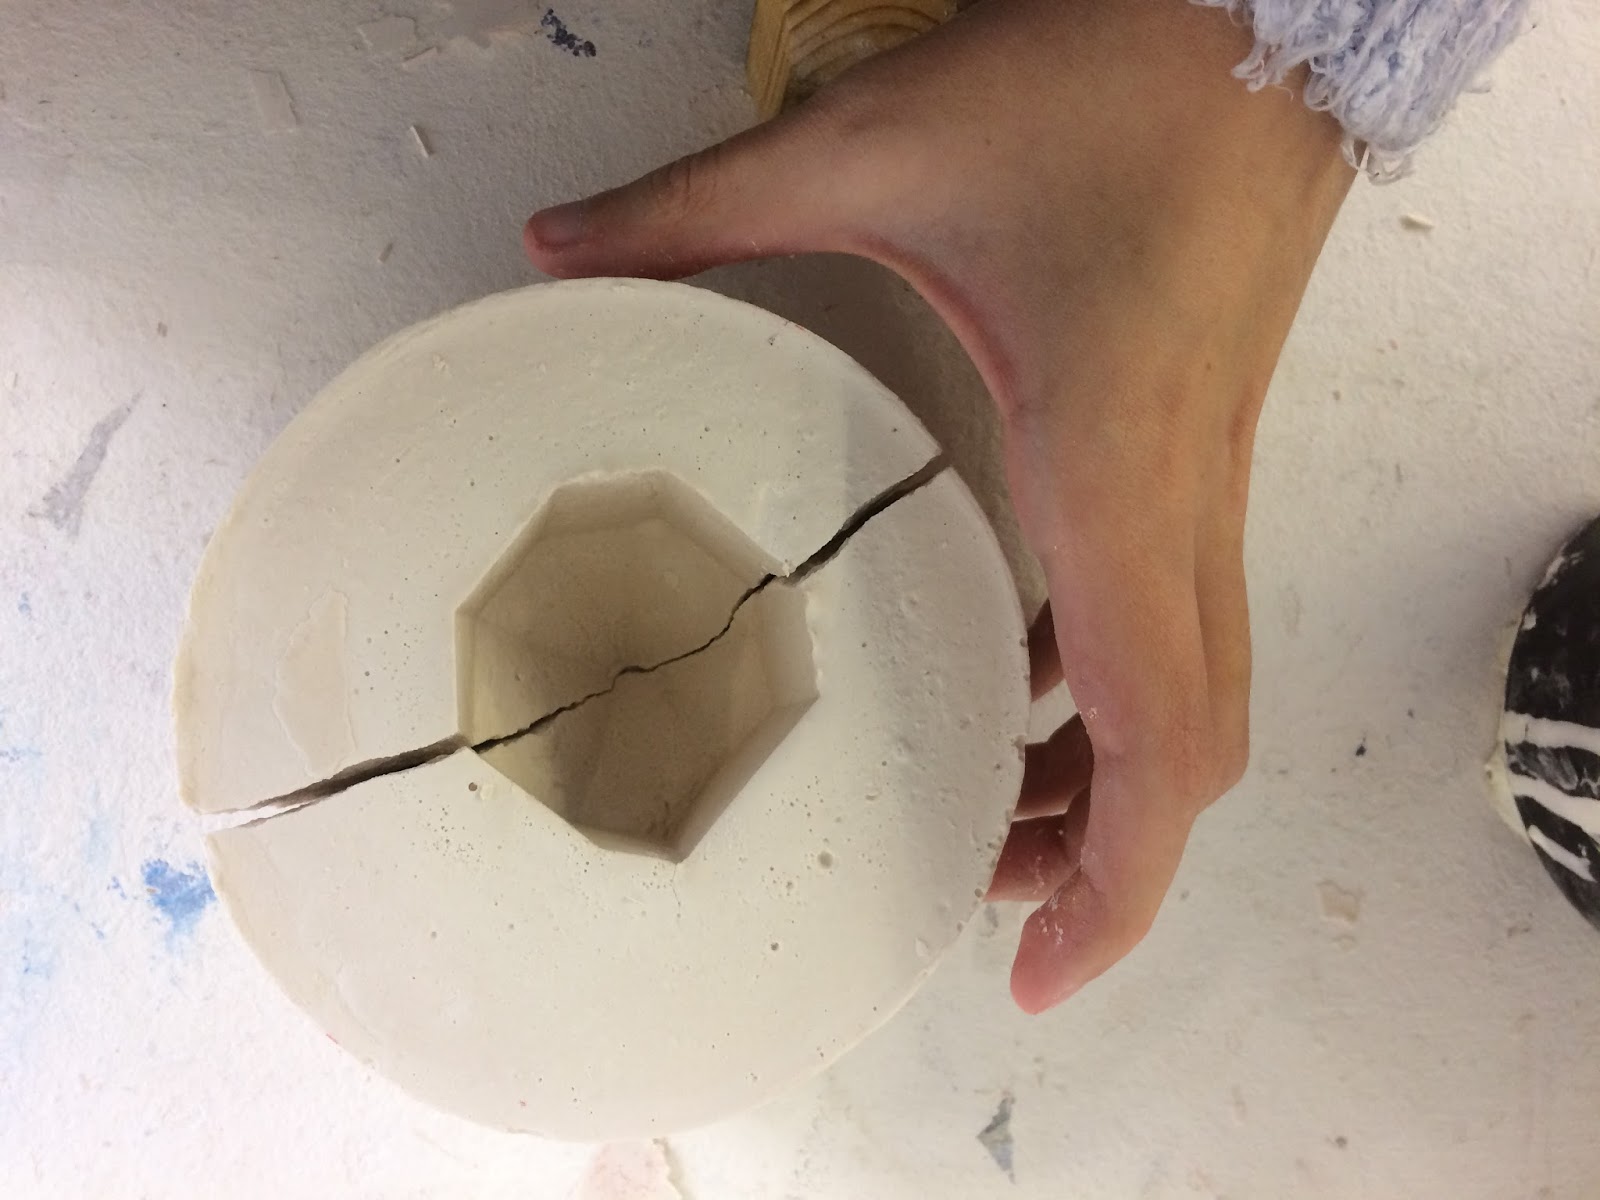
Luckily, the mould had split into two even pieces. They fitted perfectly when held gently together, so I used some heavy duty tape to tape them back together.

If I have the time, I would like to experiment with filling this mould with resin and seeing if the results are different from the alginate. (I may need to plug the bottom somehow).
I decided to fill it with hot glue. I piped hot glue straight into the mould and held it together until it dried. The two pieces separated nicely, allowing the dried hot glue to pop out easily.
See below.


I sprinkled borax crystals into the glue whilst it was still wet, hoping that it would create an interesting effect. It did.
The blue at the bottom came from a thin piece of plastic that I used to keep the glue flat. It ended up melting slightly and sticking to the hot glue. I enjoy the subtle blue gradient that it gives.
FlowerCrystals
https://www.flowercrystals.com/
In my travels I came across a website that constructs "flower crystals" with the same concept of what I wish to achieve.


The images above are absolutely beautiful in my opinion. They have captured the idea of resin crystals that I intended to explore, only they have adapted it into a beautiful, commercial line of works rather than individual pieces of art. The flowers are beautiful, although they are very stereotypically beautiful which is beyond what I was trying to achieve.
I intended to create a similar affect, only with insects of all shapes, sizes and origin. I imagine that a scorpion inside a crystal like this would have a different effect to a rose, due to the immediate connotations that come with both.
A rose is gentle and desirable, whereas a scorpion is not. The idea of trapping a scorpion within a crystal is intriguing, because there is a sense of power in being able to view a dangerous creature up close (possibly even being able to HANDLE it) without having to touch it, and without any fear or danger.
I aspire to perfect the techniques used in the creation of these flowercrystals.
No comments:
Post a Comment