Monday, 23 October 2017

5.5 Experiments with Pipe Cleaners


Whilst I was waiting for the crystals on the leaves to develop, I decided to give artificial materials one last chance.

The pom poms worked well, but ultimately they had no impact on the viewer. I wondered if using pipe cleaners (a material similar to pom poms, only malleable) would have any different effect.


 I wanted to experiment with using interesting shapes. I could twist the pipe cleaners into any formation that I wanted, which gave me much more freedom than the pom-poms and plates did.


I also had much more variation of colour, which I enjoyed as I intended for the colours to show through the translucent crystals.


I followed the usual steps for creating crystals. I used cotton thread to suspend the pipe cleaner formations in a saturated borax solution, and left them to "develop" for around 20 hours.


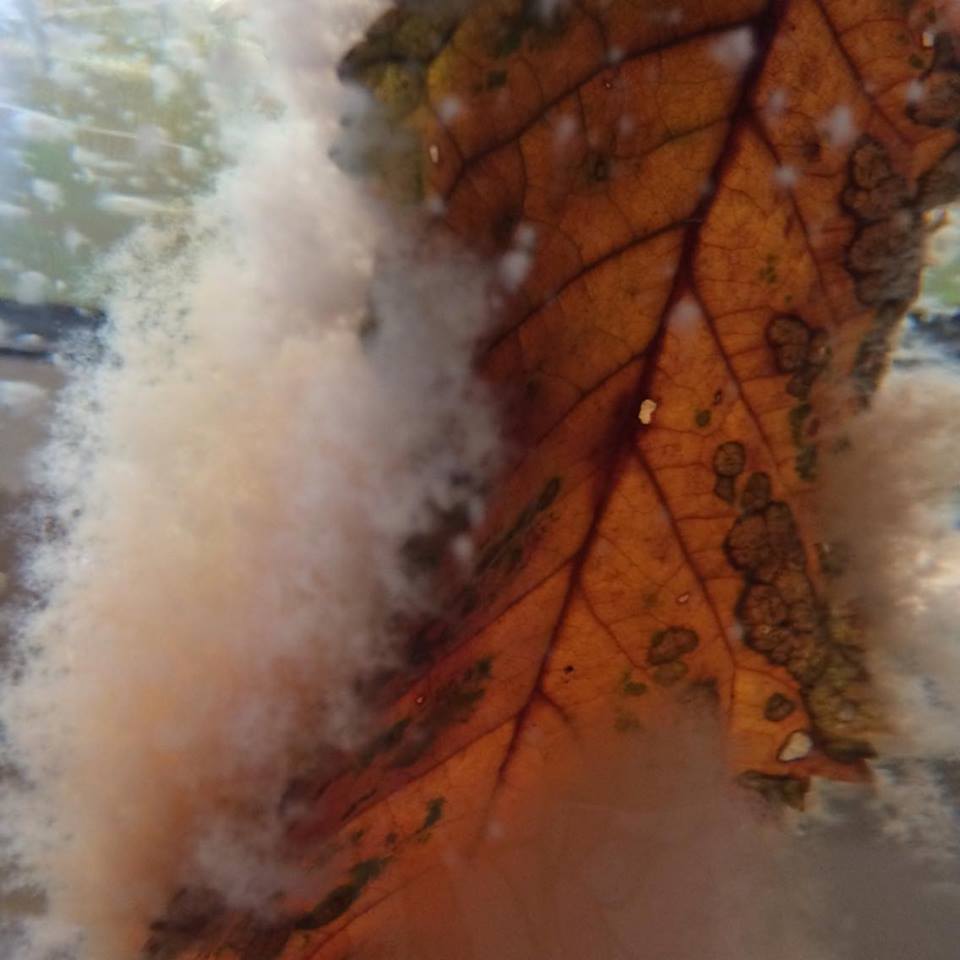
These are the results of the pipe cleaners having been freshly removed from the cups.


There were obvious variations in crystal growth.
Some of the pipe cleaners were completely engulfed in crystals, where others had raw patches which made the entire piece incredibly delicate.

They crumbled easily. I think it may have had something to do with the amount of borax I was using. I may have filled the cups unevenly to try and save borax.


This result could be classed as a failure, as it did not grow crystals in the way that I wanted it to. But regardless, I like it. I think that the wet fibres make the pipe cleaner look like a blue, frozen rose.


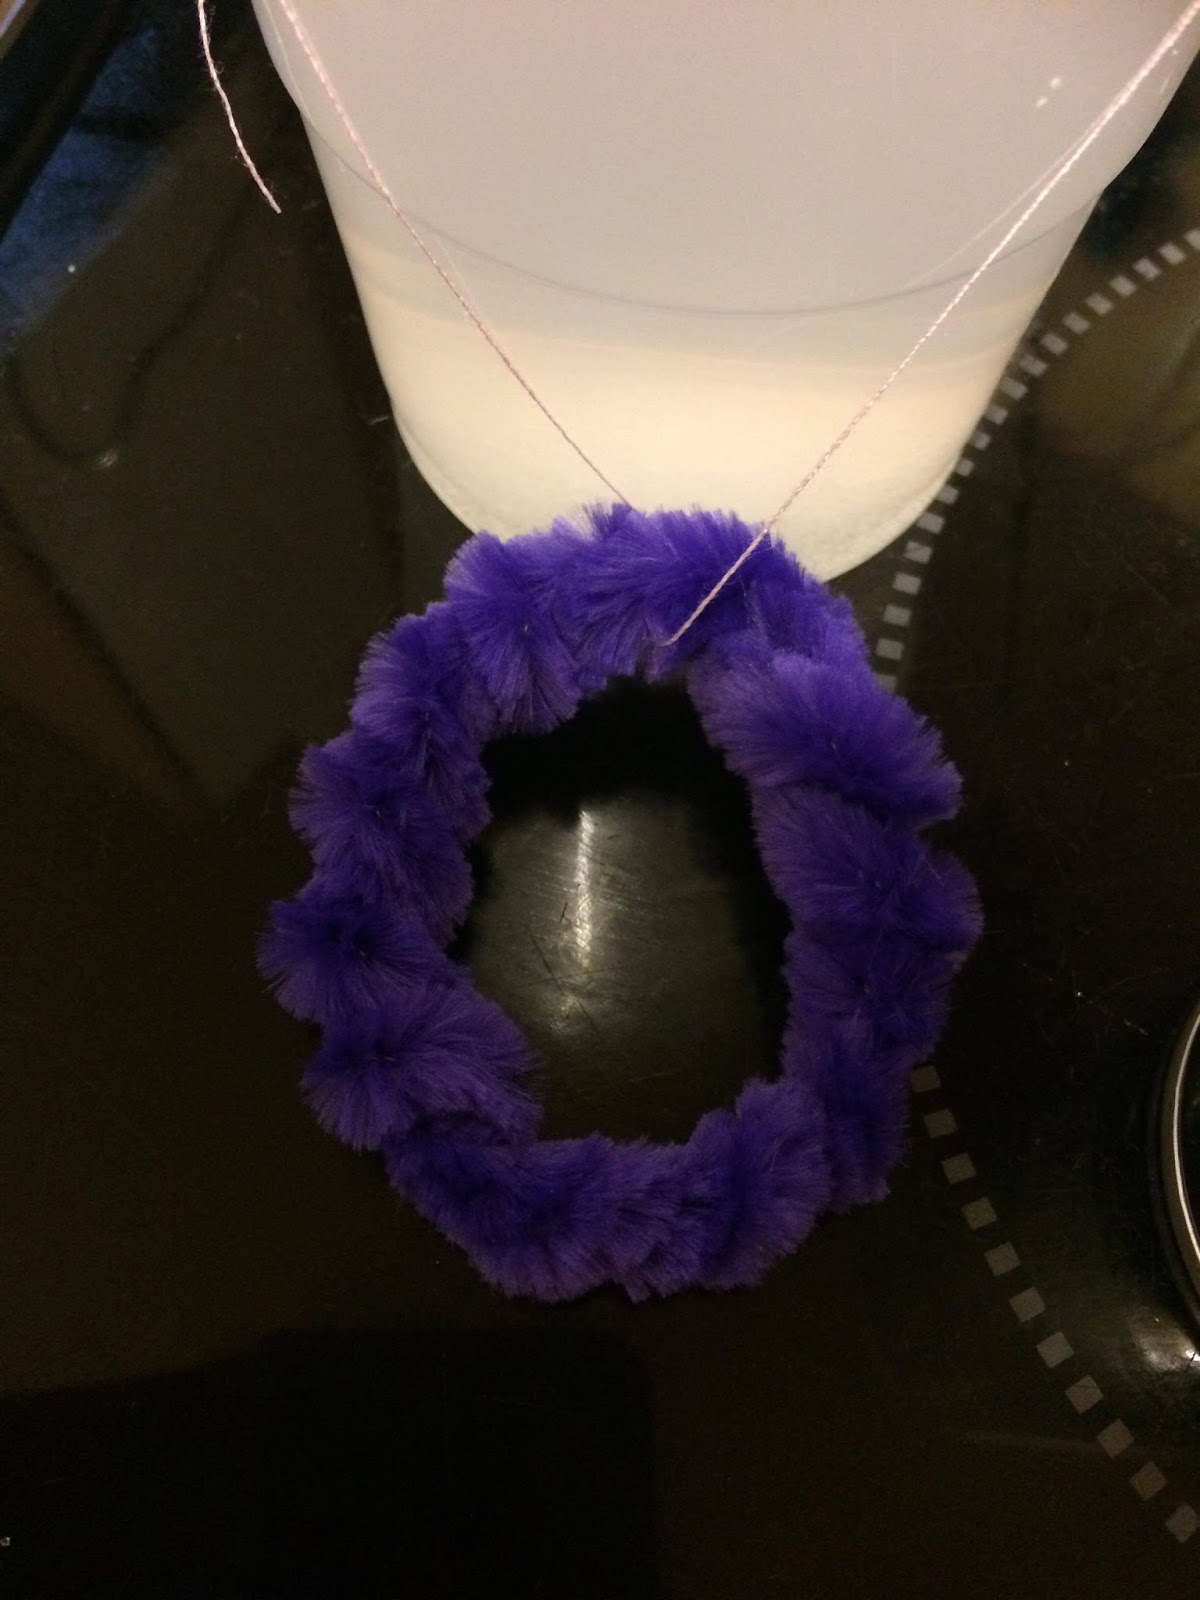
The results below are my favourites.


I feel that this "O" shaped pipe cleaner grew the most successful crystals. It came the closest to what I was trying to achieve, which was an even coverage of crystals.

It is not perfect, but it is strongly covered and quite solid. I love how the colours show through the gaps and translucent crystals.

It reminds me strongly of an amethyst geode.

Photograph by John Betts


In terms of a presentable piece, the result below is most likely the best.


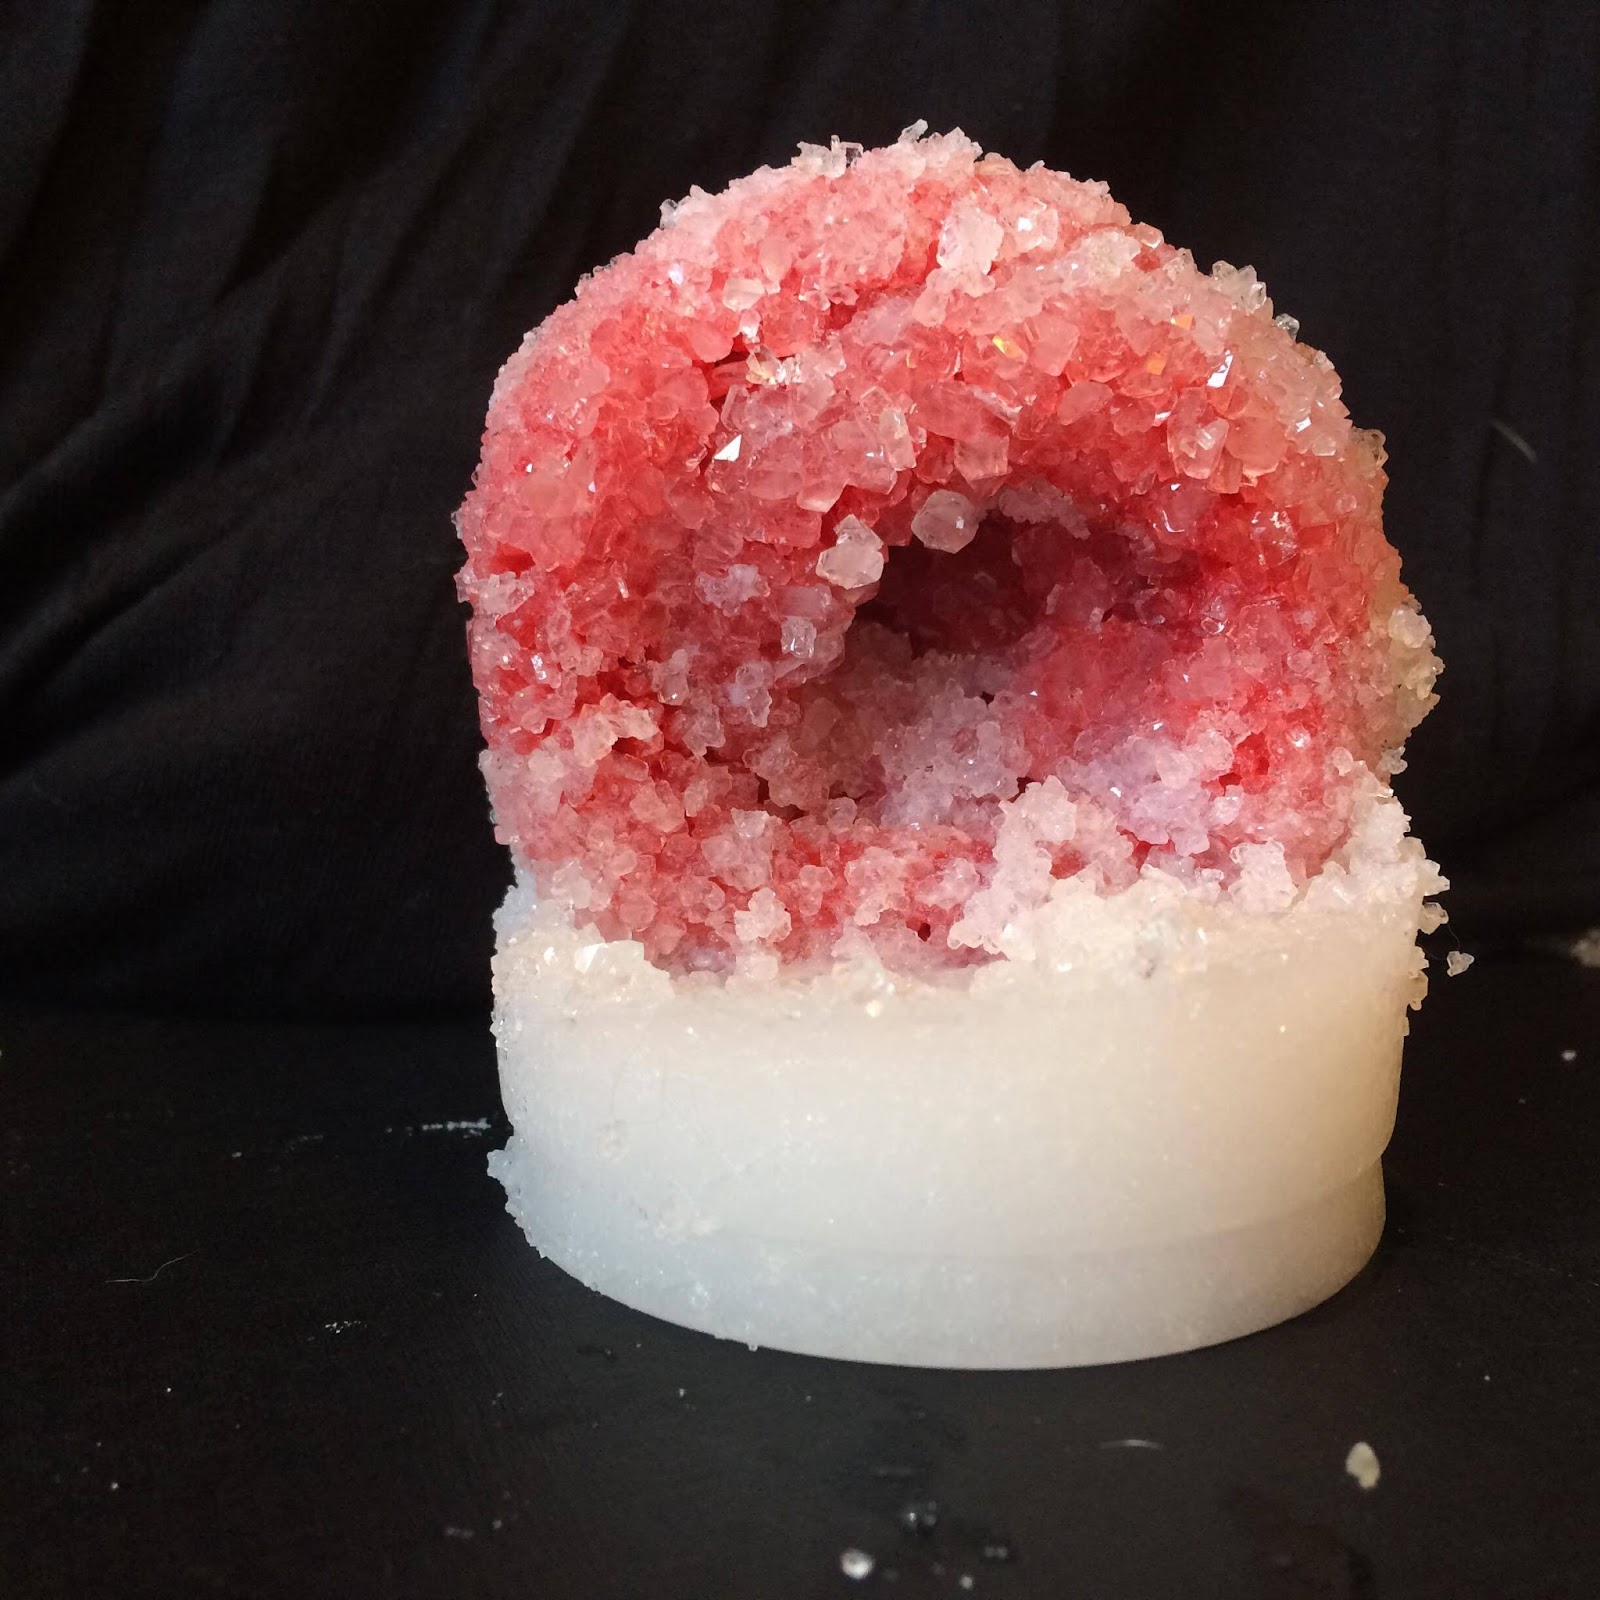
Once again, this piece reminds me of a Geode.
I think I must have overloaded this cup with borax, as the white segment at the bottom is PURE, SOLID crystal. It creates a stand and a holder for the crystallised pipe cleaner, which is perfect. The pipe cleaner itself is completely solid with crystals. There are barely any gaps at all.

This result is probably the most SUCCESSFUL, but perhaps not my favourite. I think the fact that is is red is letting it down for me. Bright red seems unfitting for something so delicate. I much prefer the purple crystal "geode", as I find it appears more natural, and more "mystical".

Red to me speaks anger and passion, neither of which I am trying to convey here.

I wondered if editing the photo would change my views.


In fact, I prefer the piece much better in black and white. It reminds me of clear quartz, and allows you to focus on the formations of the crystals rather than the vivid, obnoxious colour.

I wonder if there is any way I could alter the colour of the physical piece.


REVIEW:

I was unsure of how this experiment would carry out, considering I was not a fan of the past few artificial experiments I carried out.

I was pleasantly surprised with these results, but even still, I do not think it is something I will pursue.

The results of these experiments are pretty, and they are pleasing to look at. But they hold no impact, create no discussion, and leave no room for interpretation. At least, not for me. They are not interesting to me. Just pretty.


I do not intend to work with unnatural materials again for a while, but the experience of experimenting was valuable.

I learned to find a biting point between too much and too little borax, which will be important to know for later experiments.


5. Experimenting with Leaves


Returning to natural substances:


Last year I began growing crystals on leaves.  (see below)

Copper Sulphate on Leaves

Now, having experimented with artificial substances, I would like to return to using natural substances.

I collected some leaves from Needham Lakes, varying sizes, shapes and colours.


I sourced some 100% Borax, and also some 100% Alum.

I have experimented with Borax before, but never Alum. Alum crystals form differently to Borax crystals.

Borax crystals tend to form in square formations, from what I have seen. Whereas Alum crystals seem to form in hexagonal shapes, which I find interesting.


See here: 
I DO NOT OWN THIS VIDEO - RESEARCH PURPOSES ONLY


  BORAX:  

I wanted to experiment with borax first because I was confident that I could create good results, given my experience with it.

I sourced a big jar so that I could do larger scale experiments.


I love that it looks like I'm trying to preserve it, like some sort of medieval alchemist.
I played on this by backlighting the jar.


3 days later, the chlorophyll seemed to have seeped out of the leaf.
It wasn't green anymore.


The particles settled in a way I'd never seen before.
It looked like snow or cotton, on just one side of the leaf.

I thought this meant for sure that crystals had formed, and very strongly... but not at all.

When I removed this big leaf after 3 days, this was the result:


There were nowhere near as many crystals as I desired, so I put it straight back in the jar for another couple of days.


This did the trick. I just had to practice patience.


Once again, I am thrilled by the juxtaposition between natural patterns and subtle geometry in these images.
These borax crystals almost look like alum crystals - I say this because of how small they are, how close together, and they are much more delicate than the borax crystals I have made before.

The tiny crystals are beautiful and look like frost.
Although they are small and not quite what I planned, they worked amazingly.

The reason that they look so small may be the fact that the leaf itself is so huge. See below.


SEALING THE DESIGN:

Borax crystals are easily damaged by moisture, including humidity, so I wanted to seal the design with a clear spray lacquer.

I made sure to evenly coat the leaf with the lacquer. Results below:

 I can only assume that the tiny borax crystals reacted to the lacquer, as they turned opaque white and seemed to lose their harsh edges.

I wouldn't say this was necessarily a bad thing. It brought out all of the tiny crystals that were too small to see initially, and made them more striking.

They look more like snow than frost, now.


This is the same leaf from behind. I think it's a beautiful leaf by itself. The edges show where the tiny crystals have begun to overlap to the other side of the leaf. It looks almost like decay.


  ALUM:  

Alum crystals are cultured in exactly the same way as Borax crystals are.

The method of creation is the same.
AKA: Create a saturated solution in hot water, and suspend your item.

The only difference is that I coated each leaf in a thin coat of glue, then dipped it in the alum before suspending it. See below.


I did that with many leaves, below: This is how they appeared after 3 or 4 days.


Towards the end, I was running out of alum.

So I poured the rest of it into one solution, with the rest of my small leaves. (See coloured solution)
This was a risk, and mostly an experiment. I did not expect incredible results.


The images here would lead you to believe that the crystals forming were strong and stable.


Unfortunately that was not the case. Although I removed the leaves with great care, the crystals began to shatter like thin glass almost instantly.


Although I was surprised, I was not upset, because I think the irregularities add interest.

UNFORTUNATELY the leaf above broke beyond repair, made a mess, and had to be discarded before it was dry.


The only leaf that remained completely intact was this one.
I imagine it's because this leaf was much smaller and easier to move without bending the leaf.


The alum was very delicate and broke very easily. Although, it was not all bad, as it created some interesting shapes. I saw a fetus in this crystal formation.

 Head --------------------------------------------------------------- Feet

I placed it on top of a leaf. It fit perfectly, and it was a great, quick way to make it LOOK like the crystals had grown on top of the leaf. Although, I can not shake the idea that the crystals look like a fetus.

To me, this image looks like a baby (the crystals) squeezed inside a mother's womb. (the leaf)

I can imagine that this would be a very interesting painting, but that is not what I am focusing on right now.


Here is the most successful INTACT leaf, once I sprayed it with a clear lacquer to preserve it.


Just like the small borax crystals on the bigger leaf, the lacquer caused the alum crystals to become slightly more opaque. I love the effect.

I think that the lacquer reacts better to alum crystals than borax crystals.

These are still notably crystals, whereas the borax crystals lost their edge and looked more like snow.
v


LEFTOVER BORAX:

I had much more borax than alum at this stage, but I still had many leaves left over.

I constructed this box, using tape to suspend many leaves at a time.


I dumped in the remaining borax, and filled the box to the brim with hot water. I left it for a solid week.

 I took these progress images around 6 days in.  It looks like a winter wonderland.

The borax appears soft and fluffy whilst underwater and undeveloped.

I enjoy the abstraction that photography grants us, here.
We have no idea how large the leaves/berries actually are.

To me, the borax looks like a realistic blanket of snow, which makes the leaves look human sized in comparison.


RESULTS: 

The results were very fragile, but not unimpressive.


I was unable to capture a proper image of this piece,
although I love how that incredibly delicate flower was overtaken by the crystals.

Key words that come to mind:
Paralysed
Petrified
Frozen
Immortalised
Suspended in time

This is one of my favourite results so far, so perhaps I will try to replicate it under better conditions.


REVIEW:


What did I do?:

I experimented with growing crystals on natural substances using both Alum and Borax.

Why did I do it?:

I used leaves in order to return to natural substances. Leaves are small, attainable, free, full of natural detail (veins, colours), and come in many different shapes and sizes, so they will never become boring.

I experimented with Borax VS Alum, because I did not wish to stick to a single form of crystal growing. I wanted to experiment with a new method, to see if it yielded different results.

How did it go?

I feel that I achieved what I wanted to. I distinguished the obvious differences between using Alum and Borax, and how it may affect my practice in the future.

What did I learn specifically?:

Alum:    Small, delicate hexagonal crystals that formed in small sheets over a large surface on leaves. Easily broken.

Borax:    Slightly larger, prominent crystals that form much more quickly, and are slightly easier to handle, as they are not quite as delicate.

----- 

------- 


Reactions to Sealant:


I prefer the Alum crystals after sealing. In the future I will only seal Alum, and leave Borax unsealed.


What would I have done differently?

I would have bought more alum, as I ran out very quickly (it was a small packet.)
I wonder if the results would have been vastly different if I used more alum with the same leaves.


See an artistic review next post.